
 If you read my Summer Beauty Favorites post from earlier this week (which…you should…), you know I like to keep it simple in the summer. I mean, who doesn’t?
During the summer, I usually use about two (or three, max) eyeshadows on my eye (if I even do any eyeshadow at all). I’m not a fan of dark, dramatic smokey eyes that are going to probably melt off my face anyway.
I like to keep it quick and simple.
This isn’t as much a makeup “tutorial” as it is just a few general tips or guidelines that I always follow when doing my eye makeup in the summer. That’s why I called this my summer eyeshadow routine.
You can really follow these steps and switch out the shadows you use for whatever your favorites are. I am always switching up products and trying new things. These general guidelines will work with whatever shadows your loving!
I’m just here to make it easier and quicker for you to whip out a gorgeous eye look in a matter of minutes.
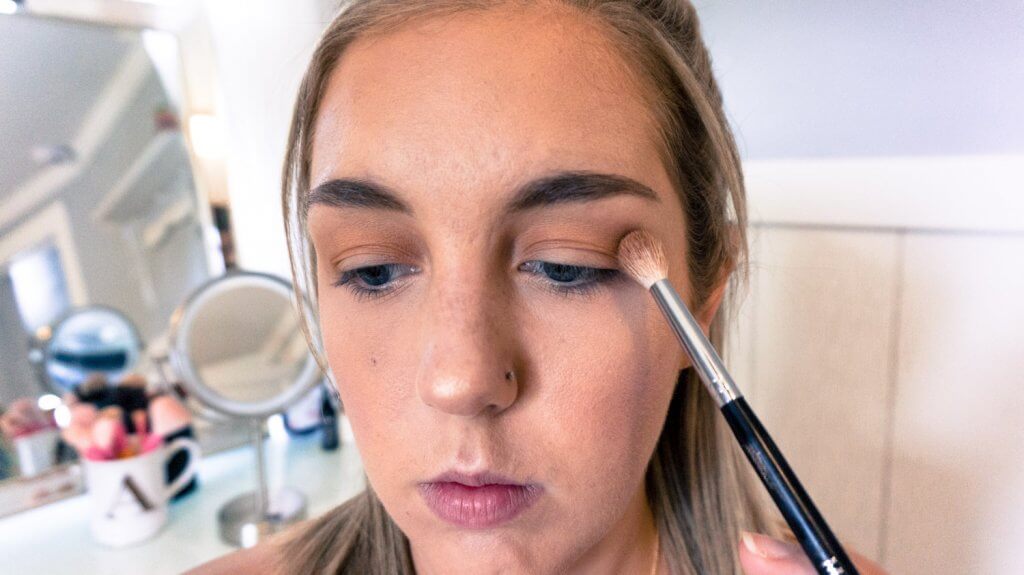
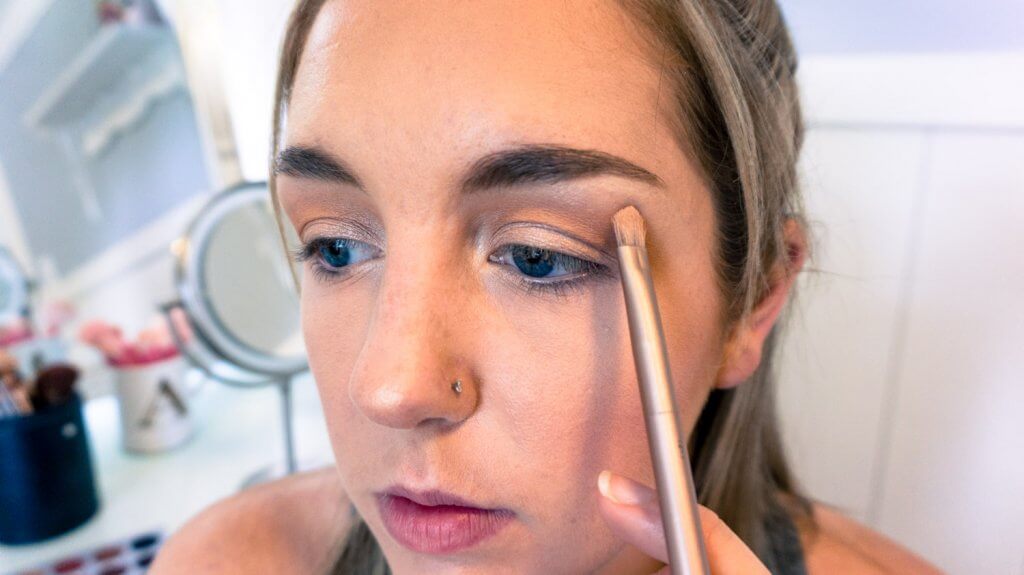
1. Start with a neutral transition color
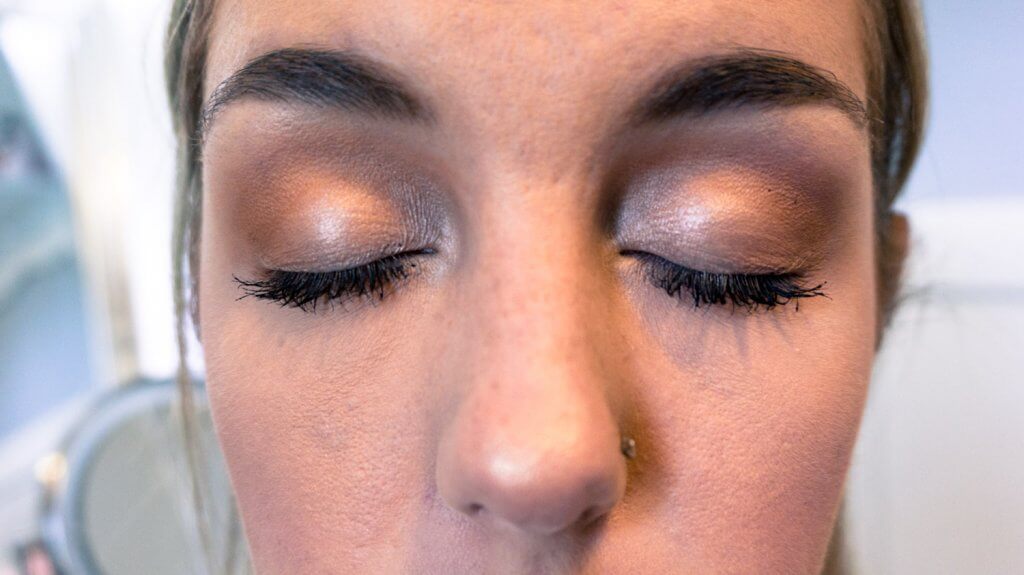
Even when I’m doing a very simple look, I always like to add a bit of definition to my eyes. The easiest way to do this is to pick a warm, neutral color to go in your crease.
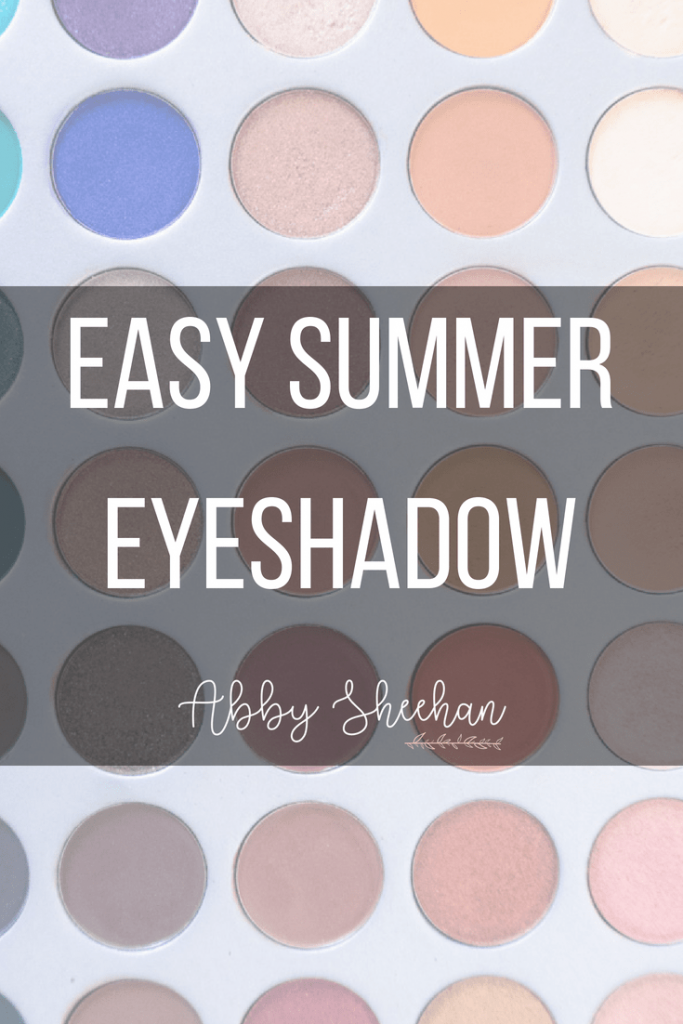
I am using my favorite Morphe X Jaclyn Hill palette (currently sold out). However, as with every step in this post, look through your own collection and use whatever eyeshadow you have, and works great for you!
Using a large, fluffy brush, apply your transition color to your crease using windshield-wiper motions. I like to use a fluffy brush because it applies the color, without making it too harsh. This also makes it easy to blend out and keeps everything looking very natural.
I am using the Morphe SOMETHING, and you can click here to read all about my favorite eyeshadow brushes and what I use each of them for!
Sometimes I choose one transition color and use that all over my crease, and sometimes I mix a few of my favorites together. Whatever you choose to do, just keep it warm and neutral and you’ll add a good amount of definition and warmth to your eyes.

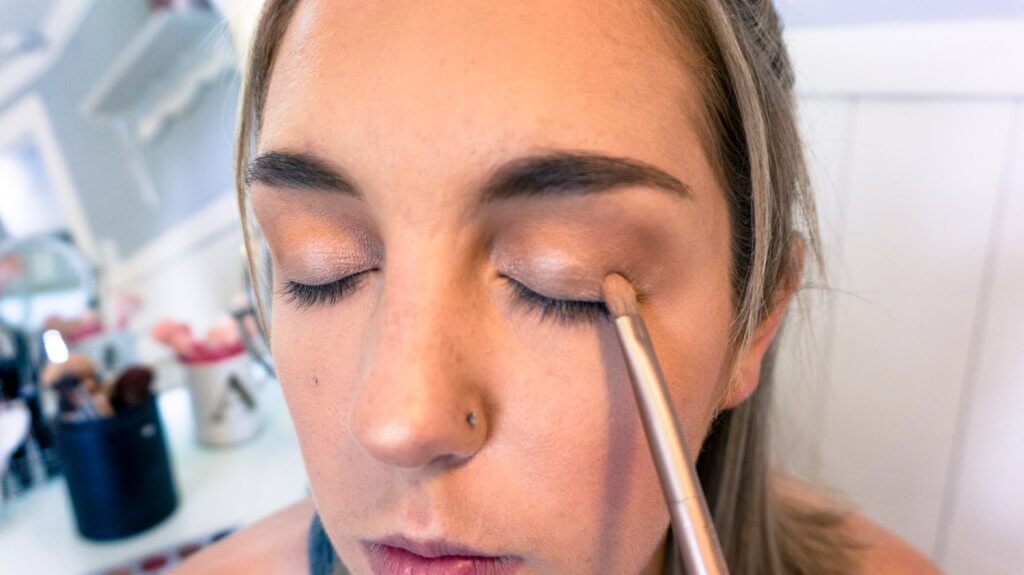
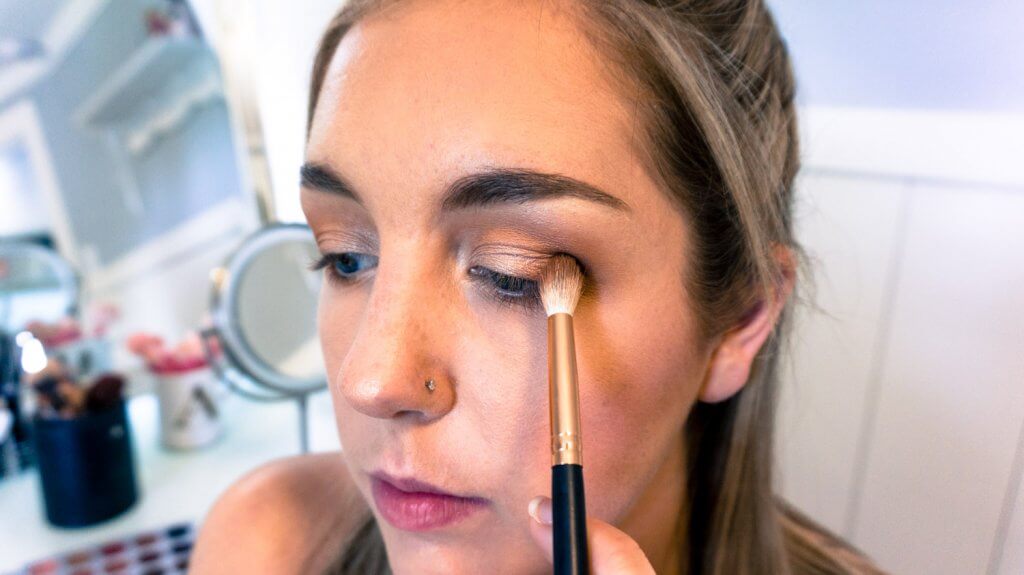
 2. Shimmery shadow all over your lid
Again, I am going to show you a few of my favorite shimmery shadows that I love to use, but look through your collection to find what you like! If shimmery shadow isn’t your thing, you can totally go for a light satin shadow. I just like using shimmers in the summer because it adds a little something extra to a very simple eye look.
Using a flat shader brush (I love this Urban Decay one), simply apply your favorite shimmer all over your lid! Try to “press” the shadow into your lid rather than “brush” it on, as that will give your more color payoff.
Take this color all the way up to your crease, where you earlier applied that transition color. At this point, I sometimes go back and forth between my fluffy brush I used for my crease shade and the flat brush I am using for my lid. This helps blend the two together so there are no harsh lines.
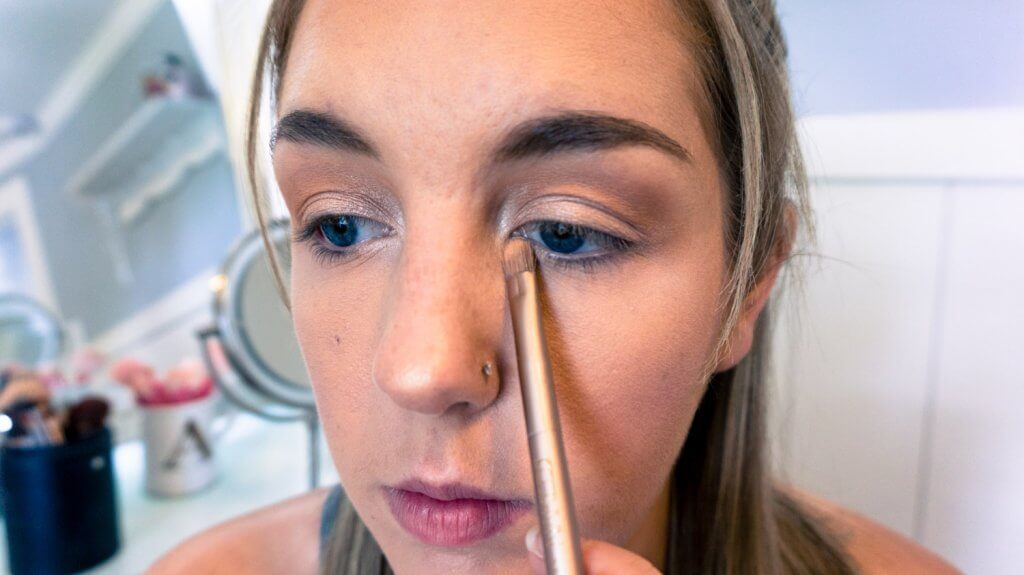
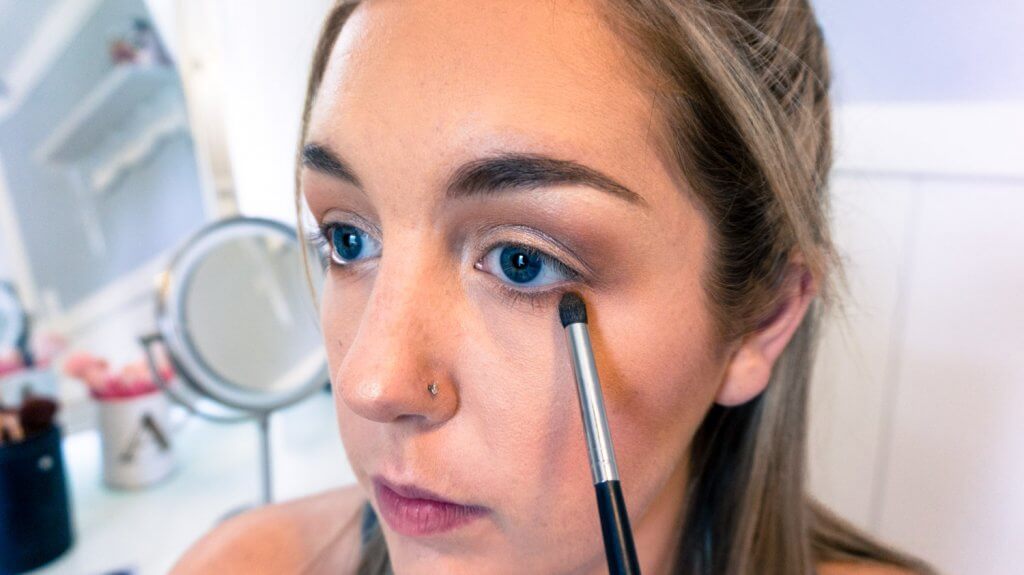
 3. Brighten up the inner corner and brow bone
As I talked about in my post: “How to Make Your Eyes Look Bigger”, applying a light color to your inner corner really makes your eyes look bright and awake. I have included a few of my favorite highlight colors that I always add to my inner corner and brow bone.
This is kind of like icing on your beautiful cake (or eye) that makes you look put together.
I use a smaller flat brush, but you could also use the same flat brush you used to apply your shimmery shadow all over your lid (in step 2), to keep it simple!
Apply the light shadow in your inner tear duct area, dragging it down below your eye slightly as well. Then, brush it right underneath your eyebrow with a light hand.
Boom! Your eyes are bright and beautiful!
 4. Define your lower lash line a bit
Remember when I talked about defining your eyes a little bit in step one? Same goes here in step four, we’re just going to define the lower lash line.
I use the exact same color I used in my crease for my lower lash line. Using a flat definer brush, I apply it about ⅔ of the way down my lash line. A pencil brush then quickly blends it out to make it a little “smokier”.
(Seriously though, getting confused about all these brushes I’m talking about? Read more here!)
This step kind of acts like a messier, simpler eyeliner for your lower lash line. Makes your eyes stand out without spending too much time or effort on eyeliner.
Using the same shadow for your crease and your lower lash line gives your an entire eye a seamless look. Also, it’s simple because you don’t have to think about it. Ba da boom.
 Bonus Tip:
If you’re feeling extra fancy, and want to spend an extra minute on your eyes, then you can darken up your outer corner with some deeper shadows. I use a denser crease brush (here I am using the Morphe SOMETHING) to pack on a bit more shadow into my outer v. Then, go back with a fluffier brush to make sure it blends together well with the rest of your existing shadows.
This extra step will just deepen up your eyes a bit. I like to do this if I want something a little extra or am doing something special that day or evening. Skip this if you don’t have the time or want to keep it simpler!
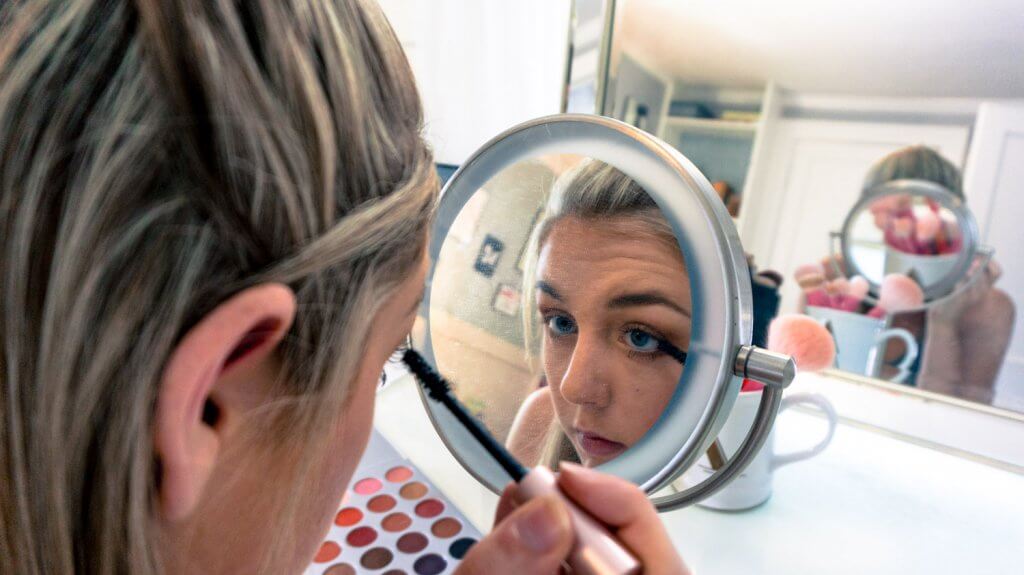
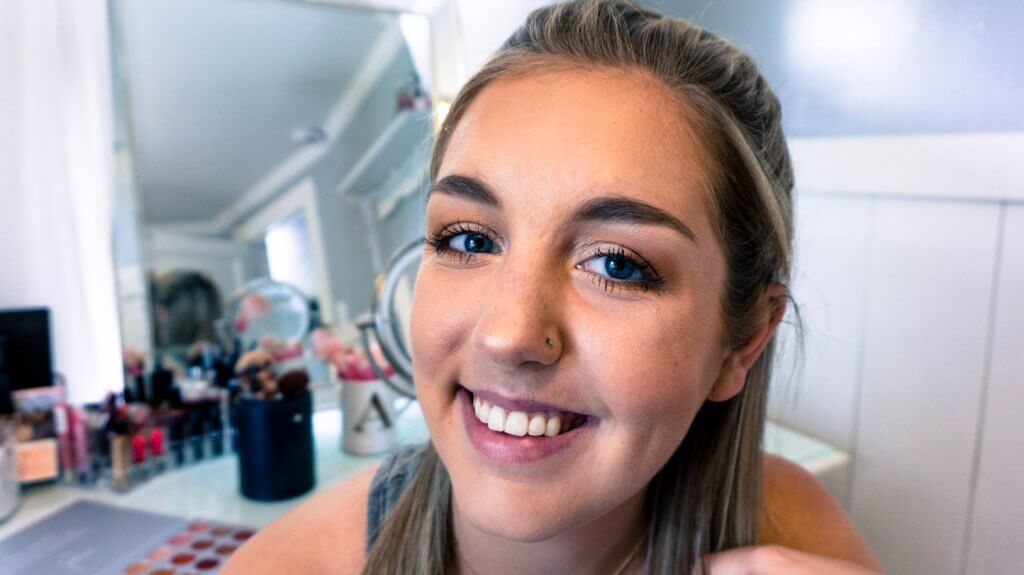
And there ya have it! Just add some mascara and you’re good to go.
 This is kind of my “formula” or summer eyeshadow routine that I always follow! Simple and foolproof…you’ll be lookin’ gorgeous in less than five minutes.


Love the look! It suits you really well 🙂 Nice and light for summer 😀 The last few months I’ve been hooked on light pink eyeshadows, especially a combo of Maybelline Color Tattoo 24h Cream Eyeshadow in Pink Gold and NYX Prismatic Eye Shadow in Girl Talk.
x
http://www.torikristine.com/
Ohhhh yes I love those shades! I’ve never tried the Maybelline one…I might have to pick it up! 🙂